- Saga 1: The Promotion
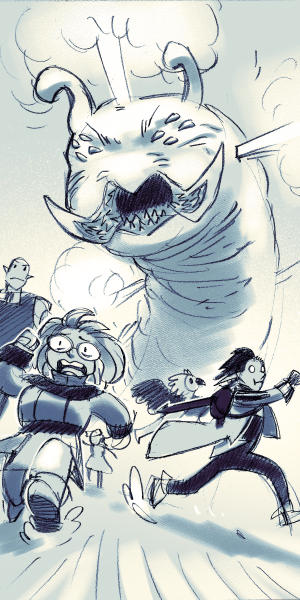
- Session 3 – The Dragon Tear 1
- Session 3 – The Dragon Tear 2
- Session 3 – The Dragon Tear 3
- Session 3 – The Dragon Tear 4
- Session 4 – Negotiations
- Session 5 – First Battle of the Thermopod 1
- Session 5 – First Battle of the Thermopod 2
- Session 5 – First Battle of the Thermopod 3
- Session 5 – First Battle of the Thermopod 4
- Session 5 – Second Battle of the Thermopod 1
- Session 5 – Second Battle of the Thermopod 2
- Session 5 – Second Battle of the Thermopod 3
- Session 5 – Second Battle of the Thermopod 4
- Session 5 – Second Battle of the Thermopod 5
- Session 6 – The Darkness 1
- Session 6 – The Darkness 2
- Session 6 – The Darkness 3
- Session 6 – The Darkness 4
- Session 6 – The Darkness 5
- Session 6 – The Darkness 5
- Session 6 – The Darkness 6
- Session 6 – Leave Her to the Dark
- Session 6 – A Lesson in Forced Friendship 1
- Session 6 – A Lesson in Forced Friendship 2
- Session 6 – A Lesson in Forced Friendship 3
- Session 6 – Creature of the Abyss 1
- Session 6 – Creature of the Abyss 2
- Session 7 – Take a Little Trip 1
- Session 7 – Take a Little Trip 2
- Session 7 – Take a Little Trip 3
- Session 7 – Take a Little Trip 4
- Session 7 – Take a Little Trip 5
- Session 7 – Take a Little Trip 6
- Session 7 – Moving On 1
- Session 7 – Moving On 2
- Session 7 – Moving On 3
- Session 9 – Checking on Alison 1
- Session 9 – Checking on Alison 2
- Session 9 – Checking on Alison 3
- Session 9 – The Bloodsand Beguiler 1
- Session 9 – The Bloodsand Beguiler 2
- Session 9 – The Bloodsand Beguiler 3
- Session 9 – The Bloodsand Beguiler 4
- Session 9 – The Bloodsand Beguiler 5
- Session 9 – The Bloodsand Beguiler 6
- Session 9 – Be Yourself 1
- Session 9 – Be Yourself 2
- Session 9 – Be Yourself 3
- Session 9 – Be Yourself 4
- Session 9 – Be Yourself 5
- Session 10 – An Idiot that Glows in the Dark 1
- Session 10 – An Idiot that Glows in the Dark 2
- Session 10 – An Idiot that Glows in the Dark 3
- Session 10 – Doctor Bonbon 1
- Session 10 – Doctor Bonbon 2
- Session 10 – Doctor Bonbon 3
- Session 10 – Doctor Bonbon 4
- Session 10 – Doctor Bonbon 5
- Session 10 – Revenge 1
- Session 10 – Revenge 2
- Session 12 – Night Out 1
- Session 12 – Night Out 2
- Session 12 – Night Out 3
- Session 12 – Night Out 4
- Session 12 – Night Out 5
- Session 12 – Night Out 6
- Session 13 – Zompig 1
- Session 13 – Zompig 2
- Session 13 – Zompig 3
- Session 13 – Zompig 4
- Session 13 – Zompig 5
- Session 13 – Zompig 6
- Session 13 – Zompig 7
- Saga 2: Homecoming
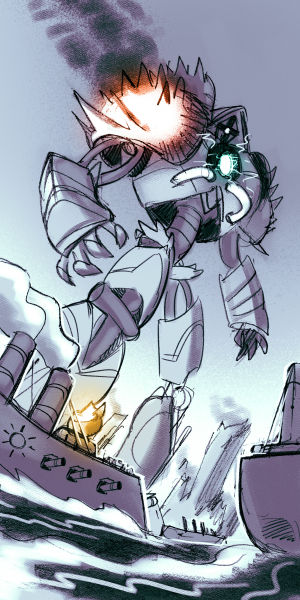
- Session 15 – Horror Harvest 1
- Session 15 – Horror Harvest 2
- Session 15 – Horror Harvest 3
- Session 15 – Horror Harvest 4
- Session 15 – Horror Harvest 5
- Session 15 – Horror Harvest 6
- Session 15 – Horror Harvest 7
- Session 15 – Horror Harvest 8
- Session 20 – Unwinnable Fight 1
- Session 20 – Unwinnable Fight 2
- Session 20 – Unwinnable Fight 3
- Session 20 – Unwinnable Fight 4
- Session 20 – Sneak Like a Bard 1
- Session 20 – Sneak Like a Bard 2
- Session 20 – Sneak Like a Bard 3
- Session 20 – Sneak Like a Bard 4
- Session 20 – Sneak Like a Bard 5
- Session 20 – Sneak Like a Bard 6
- Session 21 – Deadly Saviour 1
- Session 21 – Deadly Saviour 2
- Session 21 – Deadly Saviour 3
- Session 21 – Deadly Saviour 4
- Session 21 – Deadly Saviour 5
- Session 21 – Damned 1
- Session 21 – Damned 2
- Session 21 – Damned 3
- Session 21 – Damned 4
- Saga 3: Total Eclypse
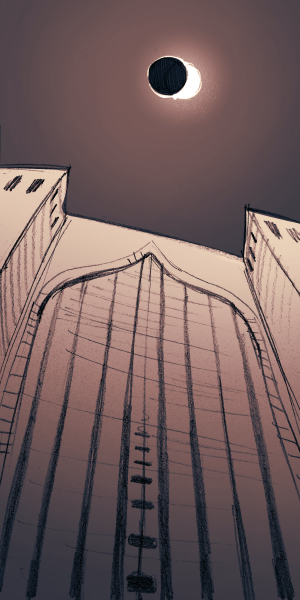
- Session 27 – Big Fan
- Session 27 – Better than You 1
- Session 27 – Better than You 2
- Session 30 – Biggest Fan 1
- Session 30 – Biggest Fan 2
- Session 30 – Biggest Fan 3
- Session 30 – Biggest Fan 4
- Session 30 – Biggest Fan 5
- Session 30 – Biggest Fan 6
- Session 30 – Roadies
- Session 30 – Pals 1
- Session 30 – Pals 2
- Session 30 – Pals 3
- Session 30 – Pals 4
- Session 31 – Tryxxie 1
- Session 31 – Tryxxie 2
- Session 31 – Tryxxie 3
- Session 31 – Tryxxie 4
- Session 31 – Tryxxie 5
- Session 31 – Tryxxie 6
- Session 31 – Tryxxie 7
- Session 31 – Promise 1
- Session 31 – Promise 2
- Session 32 – Paint it Black 1
- Session 32 – Paint it Black 2
- Session 32 – Paint it Black 3
- Session 32 – Take a Break 1
- Session 32 – Take a Break 2
- Session 32 – Worth
- Saga 4: Heartbreaker
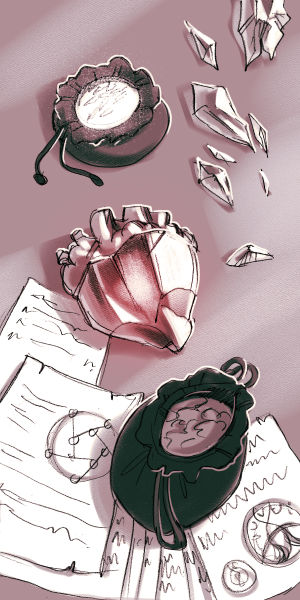
- Session 33 – Introducing… 1
- Session 33 – Introducing… 2
- Session 34 – To Be A Hero
- Session 34 – Old Friend 1
- Session 34 – Old Friend 2
- Session 34 – Old Friend 3
- Session 34 – Old Friend 4
- Session 34 – Old Friend 5
- Session 35 – New Friend 1
- Session 35 – New Friend 2
- Session 35 – New Friend 3
- Session 35 – New Friend 4
- Session 35 – New Friend 5
- Session 35 – New Friend 6
- Session 35 – Bad Romance 1
- Session 35 – Bad Romance 2
- Session 35 – Bad Romance 3
- Session 35 – Bad Romance 4
- Session 35 – Bad Romance 5
- Session 35 – Bad Romance 6
- Session 35 – Face-Heel 1
- Session 35 – Face-Heel 2
- Session 35 – Face-Heel 3
- Session 35 – Face-Heel 4
- Session 35 – Face-Heel 5
- Session 35 – Face-Heel 6
- Session 35 – Face-Heel 7
- Session 35 – Face-Heel 8
- Session 35 – Face-Heel 9
- Session 35 – Face-Heel 10
- Session 36 – You’ll Hurt Them 1
- Session 36 – You’ll Hurt Them 2
- Session 36 – You’ll Hurt Them 3
- Session 36 – You’ll Hurt Them 4
- Session 36 – You’ll Hurt Them 5
- Session 36 – You’ll Hurt Them 6
- Session 36 – You’ll Hurt Them 7
- Session 37 – Welcome to the Party
- Session 37 – You and I 1
- Session 37 – You and I 2
- Session 37 – You and I 3
- Session 37 – Together 1
- Session 37 – Together 2
- Session 37 – Together 3
- Session 37 – Apart 1
- Session 37 – Apart 2
- Session 37 – Apart 3
- Saga 5: Fires of Revolution
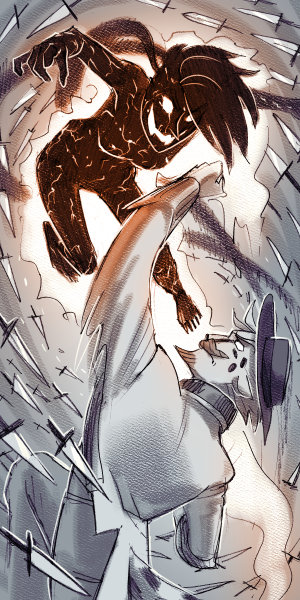
- Session 39 – Recovery 1
- Session 39 – Recovery 2
- Session 39 – “Flying”
- Session 39 – Gang Way!
- Session 40 – I’ll be Okay 1
- Session 40 – I’ll be Okay 2
- Session 40 – I’ll be Okay 3
- Session 41 – Doggles
- Session 42 – No Place for Compassion 1
- Session 42 – No Place for Compassion 2
- Session 42 – No Place for Compassion 3
- Session 42 – No Place for Compassion 4
- Session 42 – No Place for Compassion 5
- Session 42 – No Place for Compassion 6
- Session 42 – Worse than Death 1
- Session 42 – Worse than Death 2
- Session 42 – Worse than Death 3
- Session 42 – Worse than Death 4
- Session 42 – Worse than Death 5
- Session 42 – Worse than Death 6
- Session 43 – The Revolution 1
- Session 43 – The Revolution 2
- Session 43 – The Revolution 3
- Session 43 – The Revolution 4
- Session 43 – Jammin’ Jay 1
- Session 43 – Jammin’ Jay 2
- Session 43 – Jammin’ Jay 3
- Session 43 – Jammin’ Jay 4
- Session 43 – Jammin’ Jay 5
- Session 44 – An Awful Waste 1
- Session 44 – An Awful Waste 2
- Session 44 – An Awful Waste 3
- Session 44 – An Awful Waste 4
- Session 44 – An Awful Waste 5
- Session 44 – Oh, Crap
- Session 44 – Burden
- Session 44 – Who Is Lydia
- Session 44 – Heroes 1
- Session 44 – Heroes 2
- Session 44 – Heroes 3
- Session 45 – Liebkinder 1
- Session 45 – Liebkinder 2
- Session 45 – Liebkinder 3
- Session 45 – Liebkinder 4
- Session 45 – Liebkinder 5
- Session 45 – Liebkinder 6
- Session 45 – Liebkinder 7
- Session 45 – Liebkinder 8
- Session 45 – Liebkinder 9
- Session 45 – Liebkinder 10
- Session 47 – Goodbye
- Session 47 – The Tomb 1
- Session 47 – The Tomb 2
- Session 47 – The Tomb 3
- Session 47 – The Tomb 4
- Session 47 – The Tomb 5
- Session 47 – The Tomb 6
- Session 47 – The Tomb 7
- Saga 6: Beyond the Veil
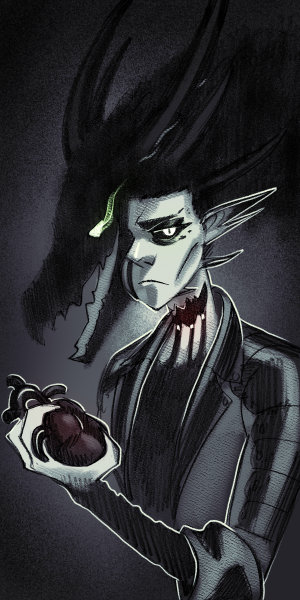
- Session 49 – Monster 1
- Session 49 – Monster 2
- Session 49 – Monster 3
- Session 49 – Monster 4
- Session 49 – Hangry
- Session 50 – Beatrix 1
- Session 50 – Beatrix 2
- Session 50 – Beatrix 3
- Session 50 – Beatrix 4
- Session 50 – Beatrix 5
- Session 50 – Beatrix 6
- Session 50 – Beatrix 7
- Session 50 – Beatrix 8
- Session 50 – Beatrix 9
- Session 50 – Beatrix 10
- Session 50 – Beatrix 11
- Session 50 – Beatrix 12
- Session 50 – Beatrix 13
- Session 50 – Beatrix 14
- Session 50 – Beatrix 15
- Session 50 – Beatrix 16
- Session 50 – Beatrix 17
- Session 50 – Beatrix 18
- Session 50 – Beatrix 19
- Session 50 – Beatrix 20
- Session 50 – Horns
- Session 51 – Ocean of Guilt 1
- Session 51 – Ocean of Guilt 2
- Sessions 52 – Too Good 1
- Sessions 52 – Too Good 2
- Sessions 52 – Too Good 3
- Session 52 – Angel 1
- Session 52 – Angel 2
- Session 52 – Angel 3
- Session 53 – Until My Darkness Goes 1
- Session 53 – Until My Darkness Goes 2
- Session 53 – Until My Darkness Goes 3
- Session 53 – Until My Darkness Goes 4
- Session 53 – Until My Darkness Goes 5
- Session 53 – Until My Darkness Goes 6
- Session 53 – Until My Darkness Goes 7
- Session 53 – Until My Darkness Goes 8
- Session 53 – Until My Darkness Goes 9
- Session 53 – Until My Darkness Goes 10
- Session 53 – Until My Darkness Goes 11
- Session 53 – Until My Darkness Goes 12
- Session 53 – Until My Darkness Goes 13
- Session 53 – Until My Darkness Goes 14
- Session 53 – Until My Darkness Goes 15
- Session 53 – Until My Darkness Goes 16
- Session 53 – Until My Darkness Goes 17
- Session 53 – Until My Darkness Goes 18
- Session 53 – Until My Darkness Goes 19
- Session 53 – Until My Darkness Goes 20
- Session 53 – Until My Darkness Goes 21
- Session 53 – Until My Darkness Goes 22
- Session 53 – Until My Darkness Goes 23
- Session 53 – Until My Darkness Goes 24
- Session 53 – Until My Darkness Goes 25
- Session 53 – Until My Darkness Goes 26
- Session 53 – Until My Darkness Goes 27
- Session 53 – Until My Darkness Goes 28
- Session 53 – Until My Darkness Goes 29
- Session 53 – Until My Darkness Goes 30
- Session 54 – Battle for Souls 1
- Session 54 – Battle for Souls 2
- Session 54 – Battle for Souls 3
- Session 54 – Battle for Souls 4
- Session 54 – Battle for Souls 5
- Session 54 – Battle for Souls 6
- Session 54 – Battle for Souls 7
- Session 54 – Stand by Me 1
- Session 54 – Stand by Me 2
- Session 54 – Stand by Me 3
- Session 54 – Stand by Me 4
- Session 54 – Stand by Me 5
- Session 54 – Stand by Me 6
- Session 54 – Stand by Me 7
- Session 54 – Stand by Me 8
- Session 54 – Stand by Me 9
- Session 54 – Stand by Me 10
- Session 54 – Stand by Me 11
- Session 54 – Stand by Me 12
- Session 54 – Stand by Me 13
- Session 54 – Stand by Me 14
- Session 54 – Stand by Me 15
- Session 54 – Stand by Me 16
- Session 54 – Stand by Me 17
- Session 54 – Stand by Me 18
- Session 54 – Stand by Me 19
- Session 54 – Stand by Me 20
- Interlude
- Saga 7: Gold Dragon Tour
- Session 55 – The L Word 1
- Session 55 – The L Word 2
- Session 55 – The L Word 3
- Session 55 – The L Word 4
- Session 55 – Accountable
- Session 55 – HUBRIS
- Session 55 – Guilt 1
- Session 55 – Guilt 2
- Session 55 – Guilt 3
- Session 55 – Guilt 4
- Session 56 – Den of Parties 1
- Session 56 – Den of Parties 2
- Session 56 – Eat the Hubris
- Session 56 – Envy 1
- Session 56 – Envy 2
- Session 56 – Envy 3
- Session 58 – Grandmother’s Yard 1
- Session 58 – Grandmother’s Yard 2
- Session 58 – Grandmother’s Dinner
- Session 58 – Grandmother’s House 1
- Session 58 – Grandmother’s House 2
- Session 58 – Grandmother’s House 3
- Session 58 – Grandmother’s House 4
- Session 58 – Grandmother’s House 5
- Session 58 – Grandmother’s House 6
- Session 58 – Grandmother’s House 7
- Session 58 – Grandmother’s House 8
- Session 58 – Grandmother’s House 9
- Session 59 – End of the Trail
- Session 59 – The Last Firebird 1
- Session 59 – The Last Firebird 2
- Session 59 – The Last Firebird 3
- Session 59 – The Last Firebird 4
- Session 59 – The Last Firebird 5
- Session 59 – The Last Firebird 6
- Session 59 – Generations 1
- Session 59 – Generations 2
- Session 60 – Mutual Friend 1
- Session 60 – Mutual Friend 2
- Session 60 – Mutual Friend 3
- Session 60 – Mutual Friend 4
- Session 60 – The Kaiser 1
- Session 60 – The Kaiser 2
- Session 60 – The Kaiser 3
- Session 60 – The Kaiser 4
- Saga 8: Sunfall
- Session 63 – Golosto Games 1
- Session 63 – Golosto Games 2
- Session 63 – Golosto Games 3
- Session 63 – Golosto Games 4
- Session 63 – Golosto Games 5
- Session 63 – Golosto Games 6
- Session 63 – Golosto Games 7
- Session 63 – Golosto Games 8
- Session 63 – Golosto Games 9
- Session 63 – Golosto Games 10
- Session 63 – Golosto Games 11
- Session 63 – Golosto Games 12
- Session 63 – Golosto Games 13
- Session 63 – Golosto Games 14
- Session 63 – Golosto Games 15
- Session 64 – Escape 1
- Session 64 – Escape 2
- Session 64 – Escape 3
- Session 64 – Escape 4
- Session 64 – Escape 5
- Session 64 – Monster Tamer 1
- Session 64 – Monster Tamer 2
- Session 64 – Monster Tamer 3
- Session 64 – Monster Tamer 4
- Session 64 – Monster Tamer 5
- Session 64 – Monster Tamer 6
- Session 64 – Framing
- Session 65 – Thunderscale Screecher 1
- Session 65 – Thunderscale Screecher 2
- Session 65 – Thunderscale Screecher 3
- Session 65 – Thunderscale Screecher 4
- Session 65 – Thunderscale Screecher 5
- Session 66 – Valid 1
- Session 66 – Valid 2
- Session 67 – Getting Along… Not
- Session 67 – The Plan, Part 1
- Session 67 – Reunion 1
- Session 67 – Reunion 2
- Session 67 – Reunion 3
- Session 67 – Circles 1
- Session 67 – Circles 2
- Session 67 – The Plan, Part 2
- Session 67 – Breakout 1
- Session 67 – Breakout 2
- Session 67 – Breakout 3
- Session 67 – Breakout 4
- Session 67 – Breakout 5
- Session 67 – Breakout 6
- Session 67 – Breakout 7
- Session 67 – Breakout 8
- Session 67 – Breakout 9
- Session 67 – Breakout 10
- Session 67 – Breakout 11
- Session 67 – Breakout 12
- Session 67 – Breakout 13
- Session 67 – Breakout 14
- Session 67 – Breakout 15
- Session 68 – Boulderhead 1
- Session 68 – Boulderhead 2
- Session 68 – Boulderhead 3
- Session 68 – Boulderhead 4
- Session 68 – Boulderhead 5
- Session 68 – Boulderhead 6
- Session 68 – Boulderhead 7
- Session 68 – Boulderhead 8
- Session 68 – Boulderhead 9
- Session 69 – Boss 1
- Session 69 – Boss 2
- Session 69 – Boss 3
- Session 69 – Boss 4
- Session 69 – Boss 5
- Session 69 – Boss 6
- Session 69 – Boss 7
- Session 70 – Prayers 1
- Session 70 – Prayers 2
- Session 70 – Prayers 3
- Session 70 – Prayers 4
- Session 73 – With You 1
- Session 73 – With You 2
- Session 73 – With You 3
- Session 73 – With You 4
- Session 73 – With You 5
- Session 73 – With You 6
- Session 73 – With You 7
- Session 73 – With You 8
- Session 73 – With You 9
- Session 73 – With You 10
- Session 73 – With You 11
- Session 73 – With You 12
- Session 73 – With You 13
- Session 77 – Secret Mission 1
- Session 77 – Secret Mission 2
- Session 83 – Malik 1
- Session 83 – Malik 2
- Session 83 – Malik 3
- Session 83 – Monitor 1
- Session 83 – Monitor 2
- Session 83 – Monitor 3
- Session 83 – Monitor 4
- Session 83 – Monitor 5
- Session 83 – Monitor 6
- Session 83 – Monitor 7
- Session 83 – Monitor 8
- Session 83 – Monitor 9
- Session 83 – Monitor 10
- Session 83 – Monitor 11
- Session 83 – Monitor 12
- Session 83 – Monitor 13
- Session 83 – Monitor 14
- Session 83 – Monitor 15
- Session 83 – Monitor 16
- Session 83 – Monitor 17
- Session 83 – Monitor 18
- Session 83 – Monitor 19
- Session 83 – Monitor 20
- Session 83 – Monitor 21
- Session 83 – Monitor 22
- Session 83 – Monitor 23
- Session 83 – Monitor 24
- Session 83 – Monitor 25
- Session 83 – Monitor 26
- Session 83 – Monitor 27
- Session 83 – Monitor 28
- Session 83 – Monitor 29
- Session 83 – Monitor 30
- Session 83 – Monitor 31
- Session 83 – Monitor 32
- Session 83 – Monitor 33
- Session 84 – Rebuilding 1
- Session 84 – Rebuilding 2
- Session 84 – Rebuilding 3
- Saga 9: Crawl Back
- Barroom Blitz 1
- Barroom Blitz 2
- Barroom Blitz 3
- Barroom Blitz 4
- Barroom Blitz 5
- Barroom Blitz 6
- Barroom Blitz 7
- Barroom Blitz 8
- Barroom Blitz 9
- Barroom Blitz 10
- Barroom Blitz 11
- Barroom Blitz 12
- Stickers & Sunshine 1
- Stickers & Sunshine 2
- Stickers & Sunshine 3
- Stickers & Sunshine 4
- Stickers & Sunshine 5
- Stickers & Sunshine 6
- Stickers & Sunshine 7
- Stickers & Sunshine 8
- Stickers & Sunshine 9
- Stickers & Sunshine 10
- Stickers & Sunshine 11
- Stickers & Sunshine 12
- Stickers & Sunshine 13
- Stickers & Sunshine 14
- Stickers & Sunshine 15
- Stickers & Sunshine 16
- Stickers & Sunshine 17
- Stickers & Sunshine 18
- Stickers & Sunshine 19
- Stickers & Sunshine 20
- Stickers & Sunshine 21
- Battleaxe 401k 1
- Battleaxe 401k 2
- Battleaxe 401k 3
- Battleaxe 401k 4
- The F Word 1
- The F Word 2
- The F Word 3
- The F Word 4
- The F Word 5
- The F Word 6
- The F Word 7
- The F Word 8
- Break It 1
- Break It 2
- Break It 3
- Break It 4
- Break It 5
- Break It 6
- Break It 7
- Break It 8
- Break It 9
- Break It 10
- Break It 11
- Break It 12
- Break It 13
- Break it 14
- Break It 15
- Break It 16
- Break It 17
- Break It 18
- Break It 19
- Break It 20
- Break It 21
- Break It 22
- Break It 23
- Break It 24
- Break It 25
- Break It 26
- Break It 27
- Break It 28
- Break It 29
- Break It 30
- Break It 31
- Break It 32
- Break It 33
- Break It 34
- Break It 35
- Break It 36
- Break It 37
- Break It 38
- Break It 39
- Break It 40
- Break It 41
- Break It 42
- Feelings from Feelings 1
- Feelings from Feelings 2
- Feelings from Feelings 3
- Feelings from Feelings 4
- Feelings From Feelings 5
- Feelings from Feelings 6
- Feelings from Feelings 7
- Feelings from Feelings 8
- Feelings from Feelings 9
- Feelings from Feelings 10
- Feelings from Feelings 11
- I Scry 1
- I Scry 2
- I Scry 3
- I Scry 4
Absolved
TTRPG Tales and Trials
